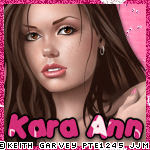
About Me

- Cntrycagal's Chaos
- My name is Kara Ann but most of you know me as Cntrycagal from facebook, forums or the tagging community! I am a 42yr old SAHM to my almost 5 yr old son, Justice. We share our life with my best friend, lover and partner who has put up with me for the past 11 yrs. I do pride myself in being a copyright compliant designer and love to create tags, siggies and avatars. I would like to branch out & learn to make scrap kits so check back often as you never know what I'll post next!
Layout and Header done by JJM Designs www.jjmdesigns.blogspot.com Scraptkit: Pink-a-licous by Addic. Powered by Blogger.
Blog Archive
Message Me
Followers
Friday, April 29, 2011
100% Boy
This tutorial is my own and any resemblance to any other is purely coincidental.
Supplies for this tutorial:
PSP (any version; I use X2)
Scrap kit : "All Boy" which is PTU kit by Crys @ Creative Scraps by Crys
Let’s begin (save often)
1) Open a new canvas: 650 x 650 (you can crop/resize later)
2) Open frame 1 from kit and copy/paste as new layer. Image/resize by 80%
3) Open bushes from kit and copy/paste as new layer. Image/resize by 80% and position to the bottom left of the frame (see my sample tag for placement reference)
4) Open treehouse from kit and copy/paste as new layer. Image/resize by 65% and move below the bushes layer in the bottom left of the frame.
5) Open little boy from kit and copy/paste as a new layer. Image/resize by 40%. Move to bottom center of design as sample tag shows.
6) Open firefly path from kit and copy/paste as new layer. Image/resize by 80%. Image/mirror and arrange so bottom of path looks like it comes out of the treehouse window.
7) Open firefly from kit and copy/paste as new layer. Image/resize by 15% and then image/free rotate 20% left. Arrange firefly at end of the firefly path.
8) Make frame layer active and click inside frame with your magic wand. Selections/modify/expand by 10. Selections/invert. Copy/paste photo of your choice as new layer. Make sure your photo layer is now active and hit the delete key on your keyboard to crop your photo. Selections/select none. Move the photo layer beneah the frame layer.
9) Add text in favorite font to type 100% Boy or wording of your choice to top of the frame. (I used Liorah BT size 36 in black.)
10) Add name in favorite font to add name to the car as shown. (I used Impress BT size 36 in black.)
I hope you enjoyed this tutorial. I would love to see anything you created from it so please feel free to email me!
Subscribe to:
Post Comments (Atom)
Labels
- cluster frame (5)
- Edward Reed (1)
- Freebie (5)
- FTU Scrap Kit (3)
- Holidays (3)
- Keith Garvey (1)
- photo (1)
- PTU Kits (2)
- Seasons (1)
- tags (1)
- Thanks (2)
- Tutorials (5)


 ">
">


2 comments:
Love it!!
Love it!!
Post a Comment