About Me

- Cntrycagal's Chaos
- My name is Kara Ann but most of you know me as Cntrycagal from facebook, forums or the tagging community! I am a 42yr old SAHM to my almost 5 yr old son, Justice. We share our life with my best friend, lover and partner who has put up with me for the past 11 yrs. I do pride myself in being a copyright compliant designer and love to create tags, siggies and avatars. I would like to branch out & learn to make scrap kits so check back often as you never know what I'll post next!
Proud Member
Forum
 Blog
Blog

Blog
Wednesday, March 23, 2011
"Peaceful" Cluster Frame
I found a little time to play around with a fantastic new PTU kit from Natalie at Candylicious Designz named "Peaceful" last night. I created a new tutorial which can also be found here on my blog for a memorial-style tag/signature but I also made up a "freebie" cluster frame! Please feel free to download but please leave me a comment or feedback to let me know how you like it as I'm still rather new at this. Click here to download it!

"Peaceful Memories" Tutorial

This tutorial is my own and any resemblance to any other is purely coincidental.
Supplies for this tutorial:
PSP (any version; I use X2)
Scrap kit : "Peaceful" which is PTU kit by Natalie @ Candylicious Designz
Artwork by Daniel B. Holeman (supplied here)
Font: Beau Rivage One
Let’s begin (save often)
1) Open a new canvas: 650 x 650 (you can crop/resize later)
2) Open frame 1 from kit and copy/paste as new layer. Image/resize by 20%.
3) Open supplied photo or one of your own as a new layer. If using the one supplied in this tutorial, image/resize 80%. Move this layer beneah the frame layer on your layers palette.
4) Using your magic wand tool (0 tolerance & feather; anti-alias checked), click inside the frame layer. Selections/modify/expand by 5. Selections/invert. Click on photo layer to activate it and then tap your delete key on keyboard to delete excess photo from frame. Selections/select none.
5) Open element 22 from kit and copy/paste as a new layer. Image/resize by 12%. Grab your selection tool (also known as a lasso) and outline one of the doors as we'll be splitting these doors into 2 separate layers.Once you have outlined one of the doors, edit/cut and paste as a new layer.
6) Move each door layer to the sides of the frame so it appears as the doors are opening from the frame as shown in sample tag.
7) Open element 57 from kit and copy/paste as new layer. Image/resize by 10%. Move to bottom right of the frame and then image/free rotate 20 to the left. Duplicate and mirror.
8) Open element 61 from kit and copy/paste as new layer. Image/resize by 12%. Move to bottom on top of the two leaves layers.
9) Open element 20 from kit and copy/paste as a new layer. Image/resize by 10%. Move to bottom and place slightly below the flower layer to your liking.
10) Open element 4 from kit and copy/paste as a new layer. Image/resize by 15%. Move the ribbon to the bottom and arrange to your liking on top of the leaves layer but below the flower layer. Once positioned, duplicate the layer and mirror so you'll have a ribbon on both sides.
11) Open element 60 from kit and copy/paste as a new layer. Image/resize by 8%. Image/free rotate 25 to the left and position near top of the right door frame.
12) Add any saying/text you prefer or use the one I used and place at the bottom of your design.
13) Add your name & proper copyright (if you used the photo I supplied you must give artwork credit to Daniel B. Holeman as shown on the sample).
14) Add mask of choice if wanted (I used Wee Scottish Lass' mask #84 with paper 8 from kit)
15) Crop tag to desired size.
I hope you enjoyed this tutorial. I would love to see anything you created from it so please feel free to email me!
Tuesday, March 22, 2011
"Egg-stra Special" Tutorial

This tutorial is my own and any resemblance to any other is purely coincidental.
Supplies for this tutorial:
PSP (any version)
Scrap kit of choice (I'm using the fabulous PTU "Eggcellent Adventure" by Crys @ Creative Scraps by Crys)
Tube of your choice (I'm using the work of Edward Reed who was at CILM but his work can now be purchased at PTE...do not use without proper license)
Word Art by Kathy Winters Design (scroll down page to locate freebie download link)
Photo: FTU stock photo here or your own image
Let’s begin (save often)
1) Open a new canvas: 650 x 650 (you can crop/resize later)
2) Open frame 2 from kit. Copy/paste as new layer. Resize by 65% and image/free rotate10 to left. Move frame slightly to the left side of canvas (see my tag for placement)
3) Open photo as new layer. Image/free rotate 10 to left and move layer below the frame layer. Then carefully use your eraser to remove excess photo edges so none is sticking out from under frame. Merge down to make frame & photo one layer for easy moving if necessary.
4) Open ribbon 6 from kit. Resize by 70% and image/free rotate 10 to left. Place at bottom of frame.
5) Open basket from kit. Copy/paste as new layer. Resize by 40%. Move to right of frame (see my tag for placement).
6) Open various colored eggs from kit. Copy/paste as new layers. Resize each egg layer by 10% and place these above the basket layer. The amt of eggs & placement is personal choice so do what looks good to you.
7) Activate your freehand selection tool (also known as your lasso) and set it to point to point with 0 feather and anti-alias checked. Then carefully trace around bottom and right edge to basket so we can remove parts of the eggs that overlap. This will make the eggs appear they are sitting in the basket. Once you have completed the trace, simply make sure you have the egg layer highlighted and tap delete key on your keyboard for each egg you placed in the basket. You may want to merge down all egg layers & basket in case you have to move this later .
8) Open your tube as new layer. Resize and place to the right side of frame above the basket layer.
9) Open word art as new layer. Resize by 15% and place to your likeing based upon tube used.
10) Add name (I used LaineDaySH font; size 65) and proper copyright info.
11) Crop to your liking!
I hope you enjoyed this tutorial. I would love to see anything you created from it so please feel free to email me!
Tuesday, March 15, 2011
I Luv Cookies Cluster Frame Freebie

Michelle, the awesome scrap kit designer over at Crafty Scraps recently allowed me to use her work to create some tags and cluster frames. Since she was so generous I thought I would be too and post the resulting cluster frame freebie.
Click here for download.
LadyBug Cluster Frame Freebie

Rainbow Fairy Tutorial
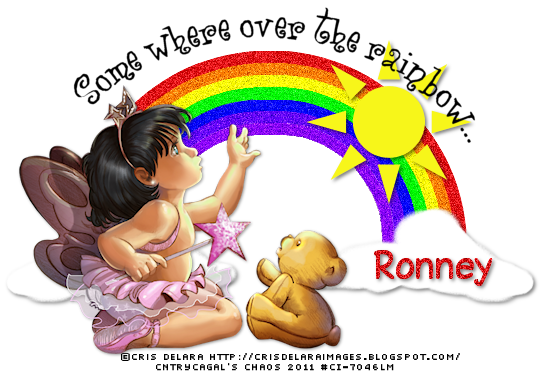
This is my first tutorial so please bear with me and feel free to leave feedback or comments so I can learn for future tutorials I write! Enjoy
For this tutorial, you’ll need a working knowledge of PSP.
I’m using PSP X2 but any version should work.
This tutorial is my own and any resemblance to any other is purely coincidental.
Supplies for this tutorial:
PSP (any version)
Template #35 by Kristin at Toxic Desirez
Tube of your choice.
Tube of choice: I'm using the cute work of Cris DeLara, who used to be with CILM. Do not use her art without a valid license.
Let’s begin!
1) Open template & delete copyright layer.
2) Image/Canvas Size to 575 x 575 (you can crop later if needed)
3) Flood fill background layer with white
4)Highlight half circle #1 layer. Select all/float/defloat. Add new raster layer and flood fill red (e21216).
Select none & delete the original half circle #1 layer.
5) Repeat step 4 for all half circle layers using the following colors (pls note that template maker have layers 4 & 5 turned around so you'll have to adjust for that if you want your colors to appear in order):
half circle #2 orange (ff7f00)
half circle #3 yellow (ffff00)
half circle #4 green (00ff00)
half circle #5 blue (0000ff)
half circle #6 indigo (6600ff)
half circle #7 violet (8b00ff)
6) Merge down all layers of the rainbow so they are one layer. Optional: You can make it appear like sample above by adding noise as follows: Adjust/Add Remove Noise/Add Noise. I did my settings at 55% with gaussian and monochrome ticked.)
6) Merge down all layers of the rainbow so they are one layer. Optional: You can make it appear like sample above by adding noise as follows: Adjust/Add Remove Noise/Add Noise. I did my settings at 55% with gaussian and monochrome ticked.)
7) Highlight sun layer. Select all/float/defloat. Add new raster layer and flood fill yellow (f7f61e).
Select none & delete the original sun layer.
8) Add tube of your choice & resize/position to your liking.
(If you are using the same tube as I did, I resize by 65% & mirrored.)
9) Add drop shadow to clouds, sun & rainbow of 2, 2, 50, 5
Add drop shadow to tube of 1,1, 40, 4
9) Add name & copyright information. Crop or not; your choice.
Subscribe to:
Posts (Atom)


 ">
">